Object Storage Quick Start
Create a Container
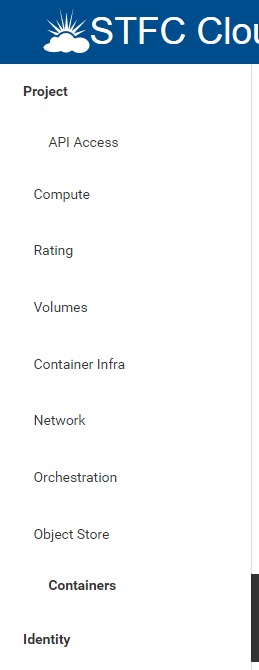
In the Openstack web interface, expand Object Store and then click Containers on the left hand side of the screen.
Click + Container.

On the Create Container screen, enter a name for the container and select whether the container should be publicly accessible, then click Submit.
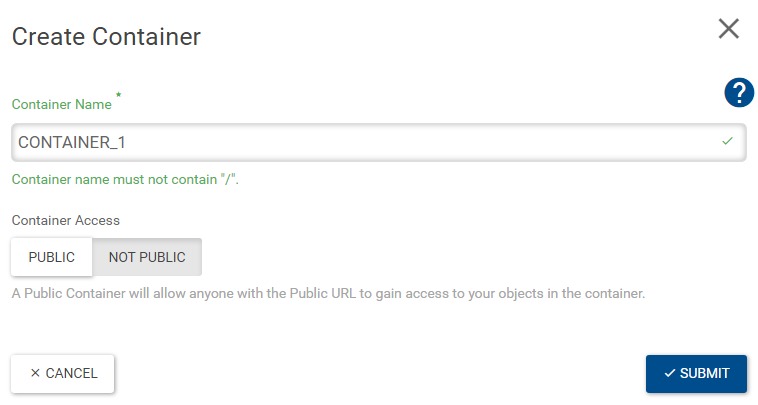
Warning
Selecting “public” will allow the contents of a container to be viewed by anyone, with no authentication required. See Editing Container Metadata or Containers for greater control over read and write access.
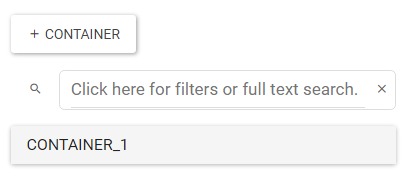
If successful, the container will be listed below the + Container button.
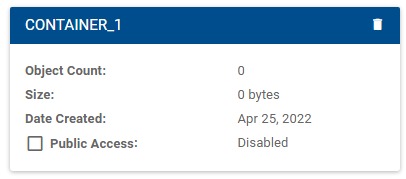
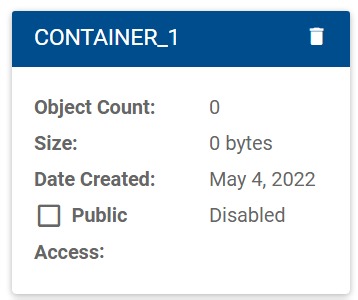
Details of the container may be viewed by clicking on the listing. This will also display a checkbox that may be clicked to enable or disable public access.
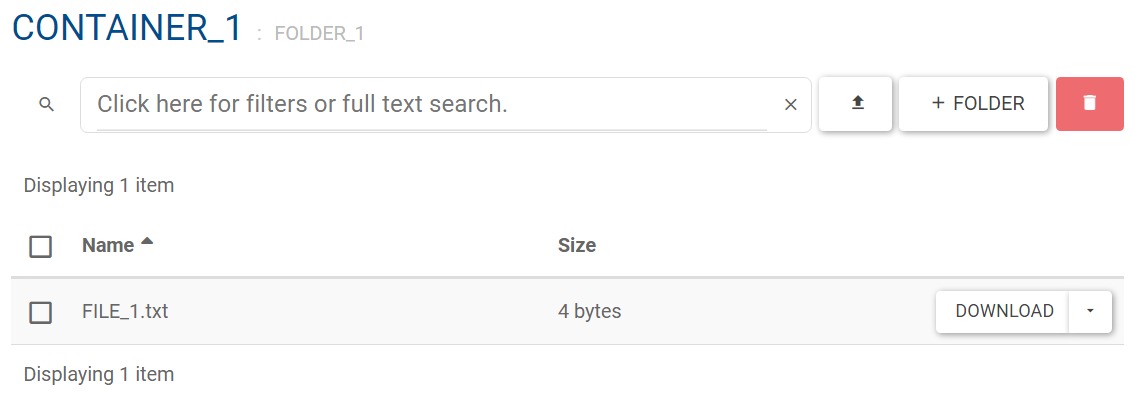
Upload a File
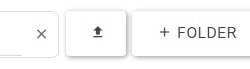
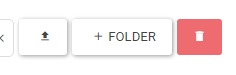
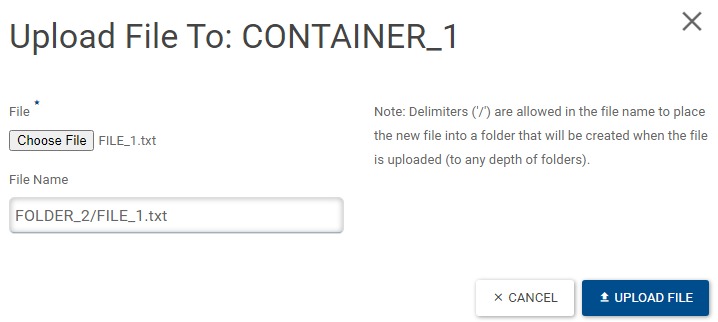
Having selected a listed container, click the Upload icon next to + Folder.
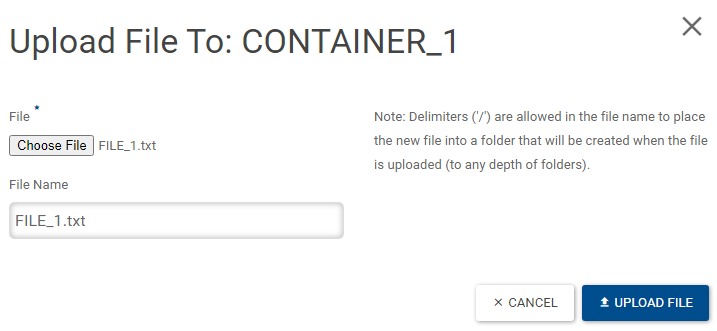
Select a file to upload, and a unique name for it in the container. Then click Upload File.
Warning
Files uploaded in this way must be less than 5GiB. See Large Files for instructions on uploading larger files. If Error: Unable to upload the object is displayed for a file smaller than this, you may need to contact the Cloud team to request a quota increase.
If successful, the file will be listed below the Upload icon.

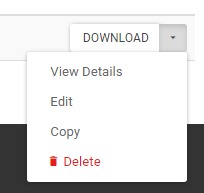
To view file details, select the arrow next to Download to view the options, then click View Details.
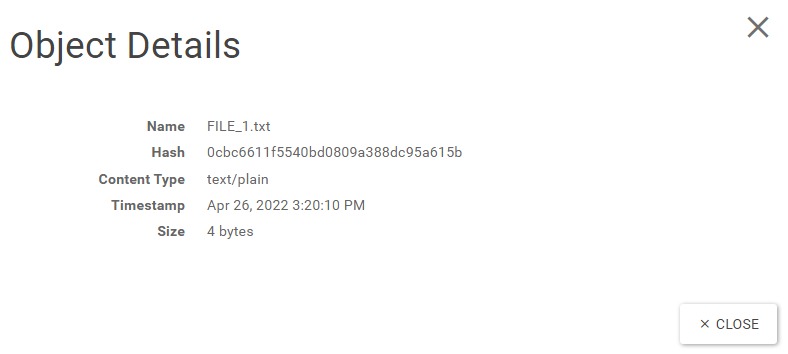
The file details will then be shown.
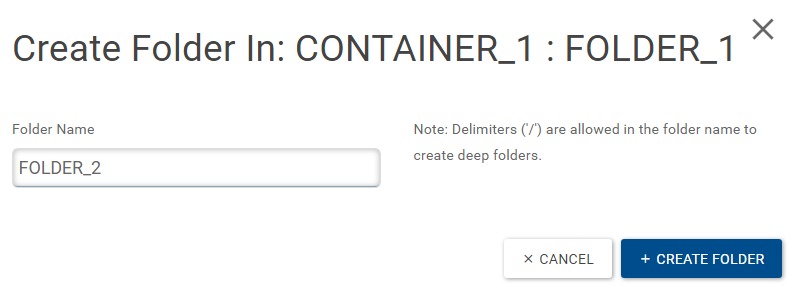
Create a Folder
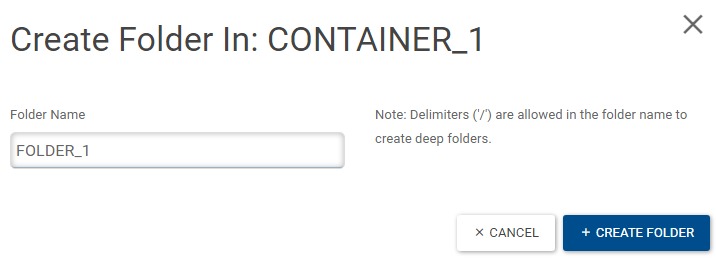
To create an empty folder, click + Folder.
Enter a unique folder name, then click Create Folder.
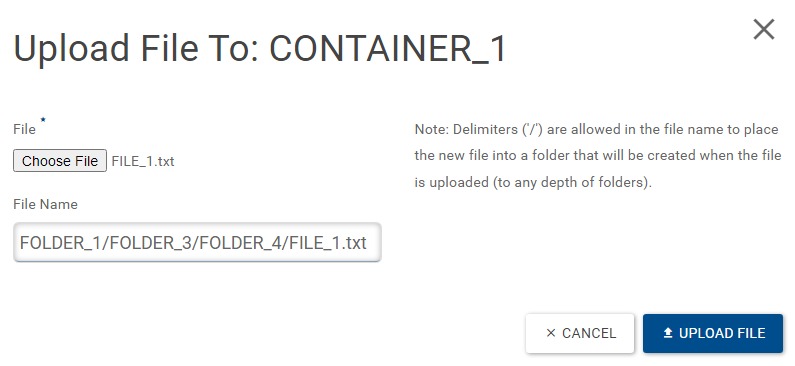
Alternatively, folders may be created by including a new folder name, followed by a delimiter (‘/’), before the name of an uploaded file.
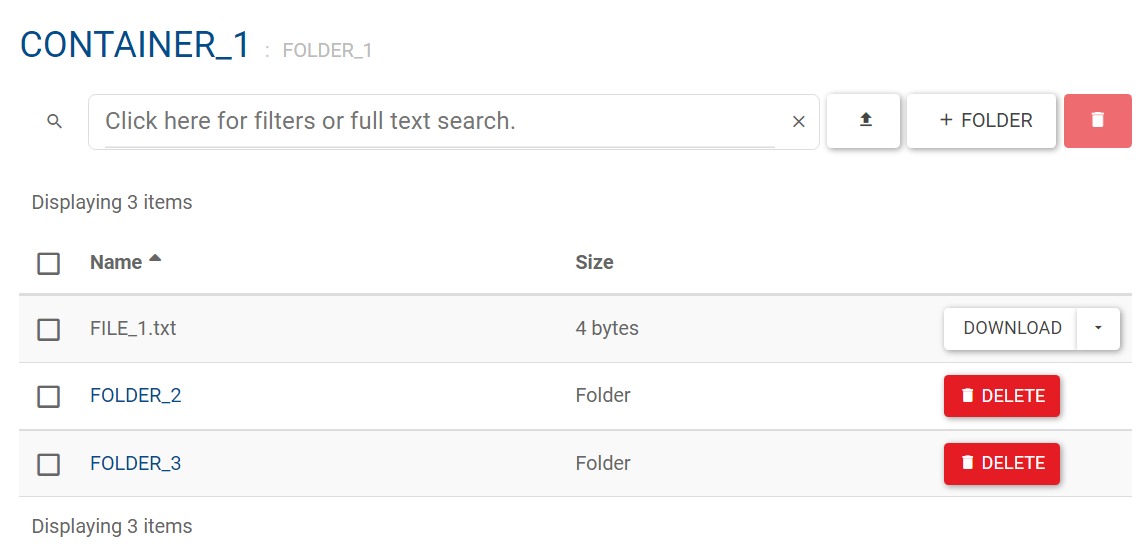
If successful, the folder will be listed with other files in the container.
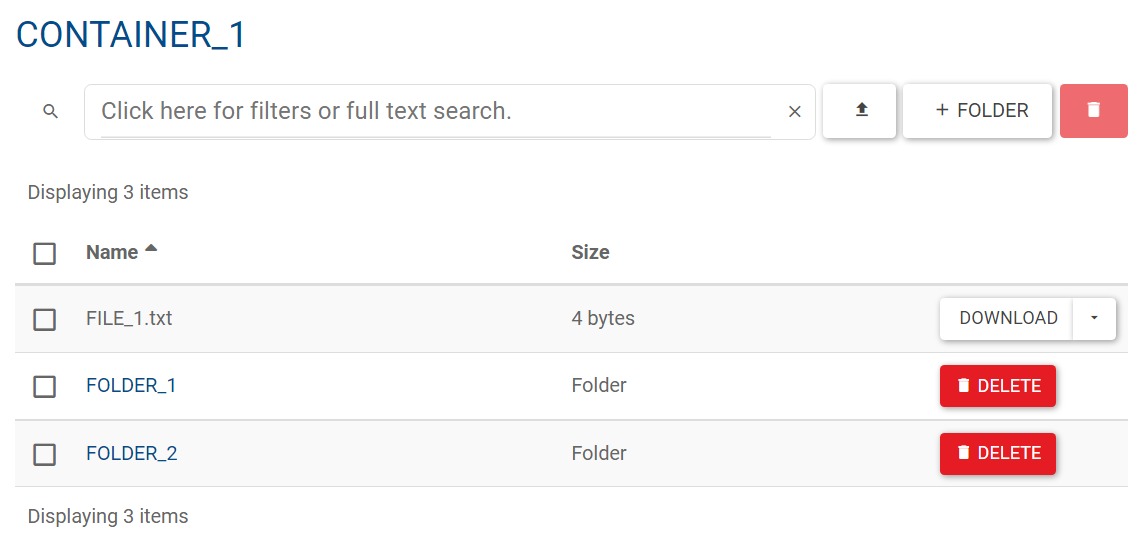
The contents of a folder may be viewed by clicking the folder listing.
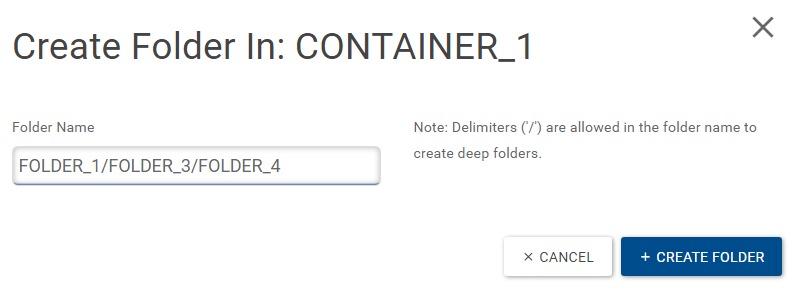
Create Deep Folders
When viewing a folder, a deep folder can be created by selecting + Folder, as previously when viewing a container.
Multiple levels of folders may be created by including delimiters (‘/’) between each folder name. Any folders specified that do not exist will be created.
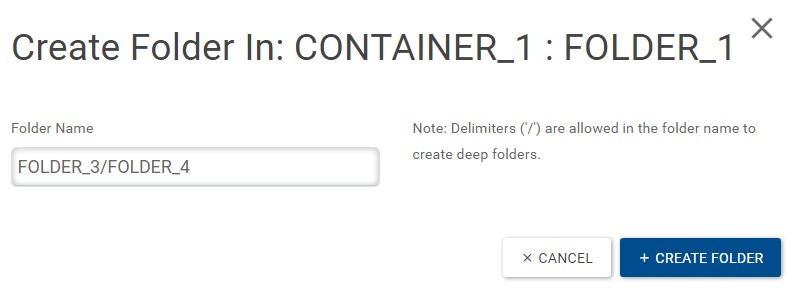
This can equivalently be done when viewing the container, outside all folders.
Alternatively, the new folder names may be included when uploading a file.
As when viewing a container, the next level of folders will be listed alongside files in the folder you are viewing. Deeper folders and files will not be displayed without navigating into their parent folders by selecting them.
Delete a File
To delete an individual file, select the arrow next to Download to view the file options, then clicking Delete.
On the Delete Files screen, select Delete to begin deletion.

If successful, a progress bar should fill, and the Delete Files screen can be dismissed by clicking OK or X.
Delete a Folder
To delete a folder and its contents, click the Delete button.

As for a file, on the Delete Files screen, select Delete to begin deletion.
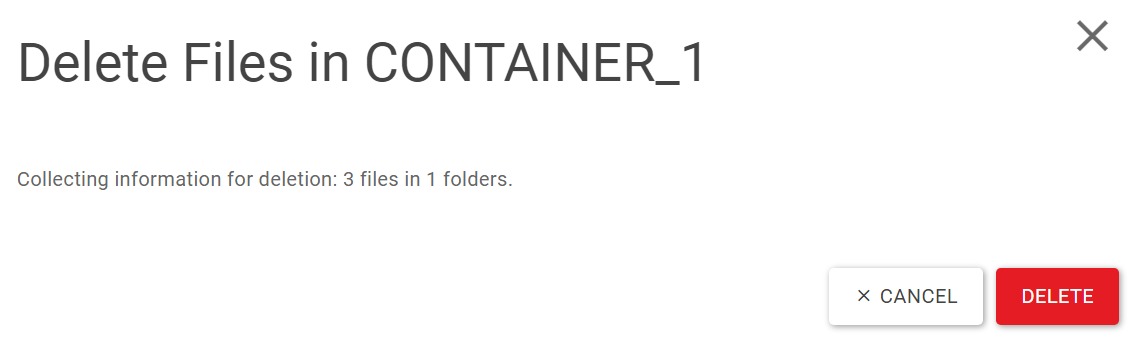
If successful, a progress bar should fill, and the Delete Files screen can be dismissed by clicking OK or X.
Delete Multiple Files or Folders
Select the files and/or folders to be deleted by clicking the checkbox next to each. All file and folder in the current folder or container can be selected by clicking the checkbox next to Name.
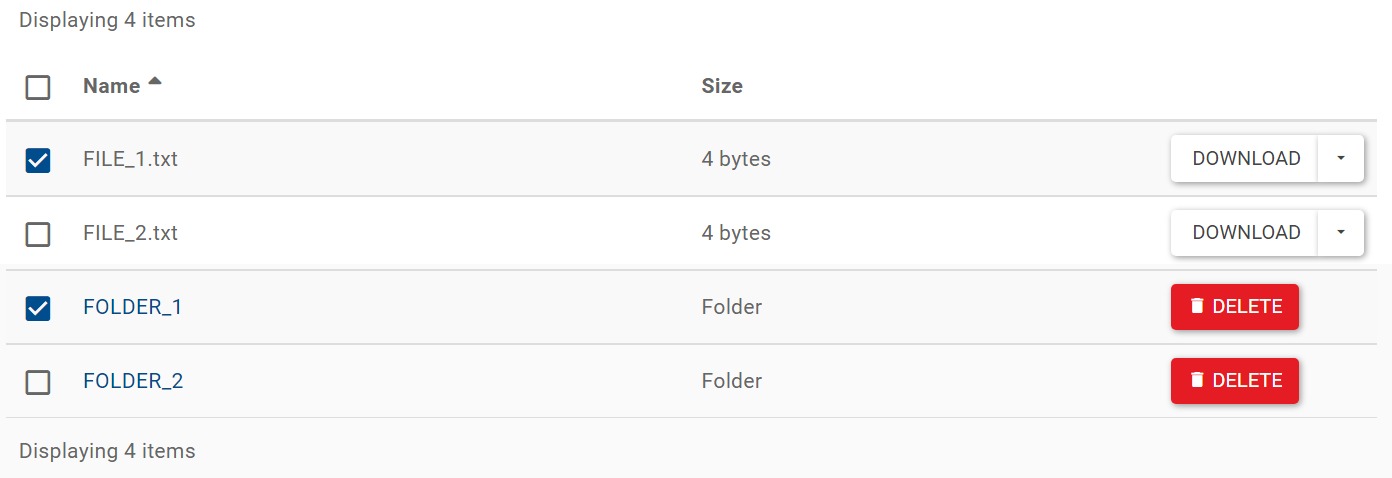
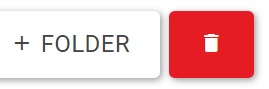
Click the Delete icon next to + Folder.
As for individual files and folders, select Delete on the Delete Files screen to begin deletion. You can then dismiss the Delete Files screen.
Delete a Container
In order to delete a container, all files and folders in the container must first be deleted. Then, with the container selected, click the Delete icon next to its name.
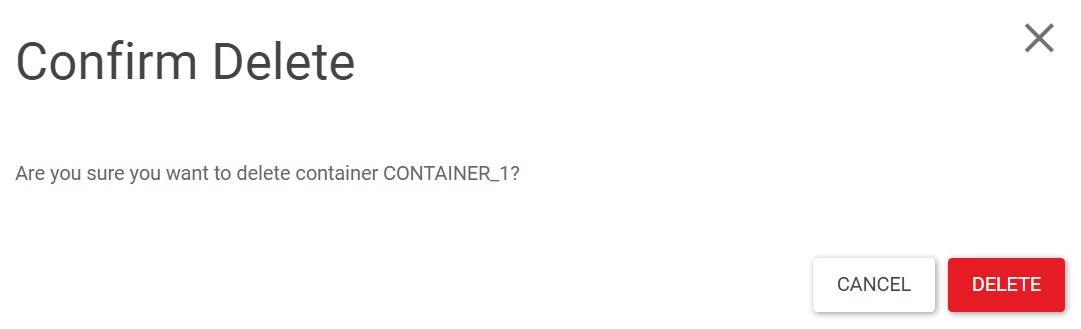
On the the Confirm Delete screen, select Delete to begin deletion.
If successful, a success message will appear, and the container will no longer be listed.
Edit a File
To edit a file, select the arrow next to Download to view the options, then click Edit.
On the Edit File screen, select Choose file to specify the new contents of the file, then click Edit File.

If successful, a success message will appear, and the file details will be updated.
Warning
Editing a file will remove any existing properties, apart from Orig-Filename, which will be set to the uploaded file name.
See also: Editing Object Metadata
Copy a File
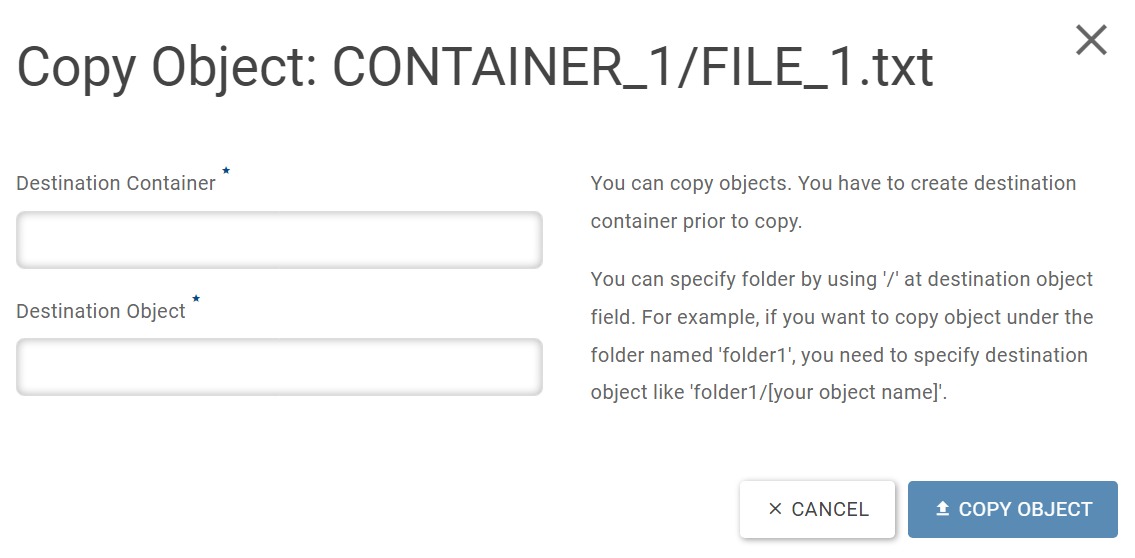
To copy a file, select the arrow next to Download to view the options, then click Copy.
On the Copy Object screen, enter the name of the destination container and destination file name, then click Copy Object.
If successful, a success message will appear, and the copied file will be listed.
Limitations
Some Swift features are unavabile through the GUI, and so must be performed using the Python SDK and/or the CLI. For example:
Viewing all metadata for your account, containers and objects
Uploading and downloading multiple files simultaneously
Setting metadata for containers and objects
References
https://docs.openstack.org/horizon/train/user/manage-containers.html