Create a Virtual Machine on Openstack using the Openstack Web interface
Scenario
This document describes how to create a virtual machine once a project environment has been setup for a user. It assumes that the user has a login to openstack, and has already added their SSH public key into the openstack system.
Procedure
Login to the openstack interface. Select your project at the top of the screen if you have access to multiple projects.

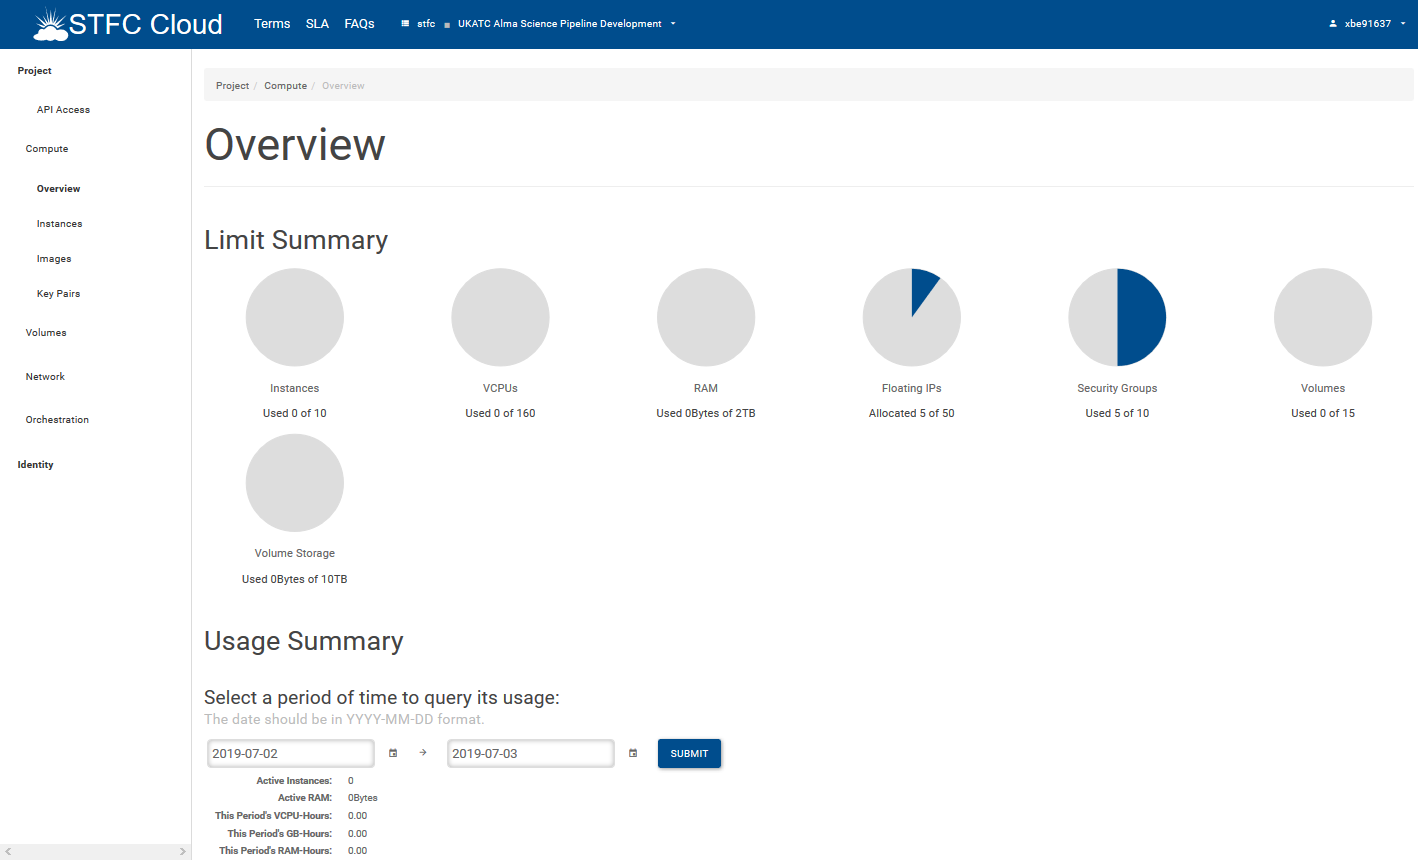
Click on Compute, then Overview: This screen will show you the quota limits set up so far, and how much of those quota limits are consumed by your project. This is important as if you attempt to build a virtual machine that exceeds these limits, it will fail to build !
If the quotas look fine, and you do not need them expanding (should you need this, you should contact cloud-support@stfc.ac.uk, after first checking with the other users of the project that all the VMs currently running or shutdown are needed !), Click on the Instances option on the Left Hand Side. Click on the “Launch Instance” button. You will see a pop-up window as follows:-
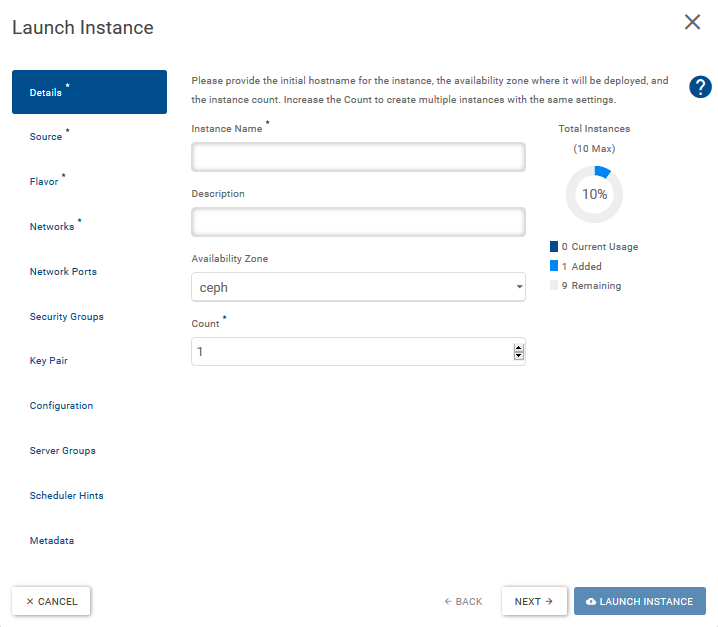
Some of the Left Hand Side menu options of the pop-up window have asterisks next to them (*). This means that there is mandatory information that needs to be filled in, in order for Openstack to create the virtual machine. Click on “Details” first: Fill in an instance name in the field. This is how the machine is referred to within openstack. Fill in a description: This is more to help other users of the project, and cloud admins as to what the host is used for. Availability zone: This should be set to “Ceph”. If you have an option, select “Ceph”. (Ceph is the back-end storage system we use for Cloud hosts). Count: This must be set to at least “1”. You can create multiples of the same host at the same time, but creating larger numbers of hosts at the same can generate some build errors for some of the hosts (General rule of thumb is that generally, not more than 25 at a time). Now click on the “Source” option on the Left Hand Side:-
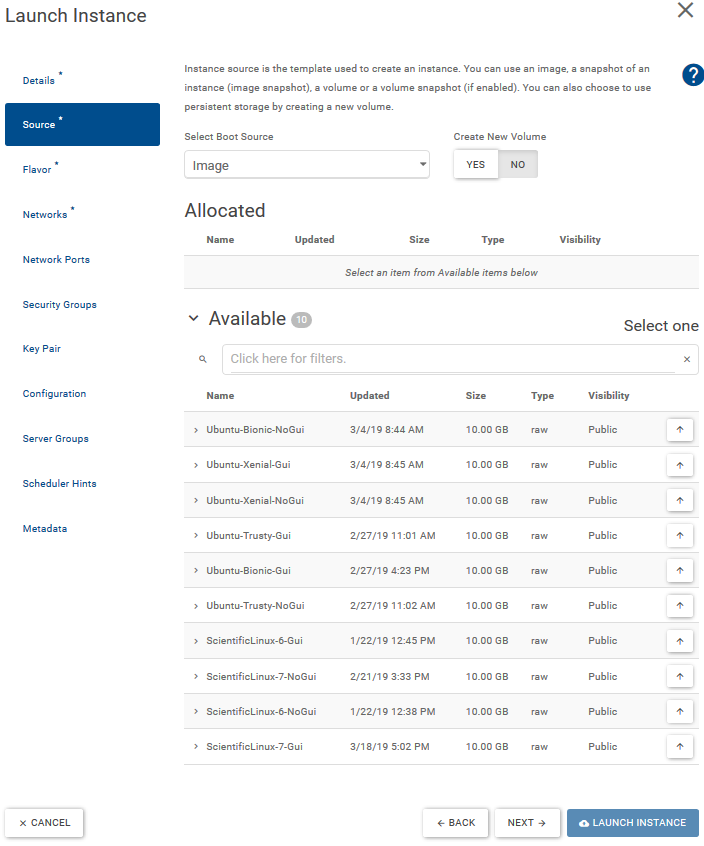
In the Select Boot Source, the default should be “Image” and “Create new volume” should be set to “no” unless you require your VM to have resilient storage for it’s boot drive . What you select in this field determines what you see as options in “Available” just below. “Image” should provide one of the standard template STFC Cloud ready images that we support: By default, we usually have the last 3 Ubuntu supported images, with a GUI and non-gui option, and we also have a Scientific Linux 6 and 7 gui and non-gui option. We are expcting to have a Centos 7 image available sometime in the near future. Select the image you wish by clicking on the up arrow the option I the Available area. This should transfer it to the “Allocated” area. (We will not explore the other options for boot source in this scenario). Once an image is selected, click on the “Flavor” list in the Left Hand Side:-
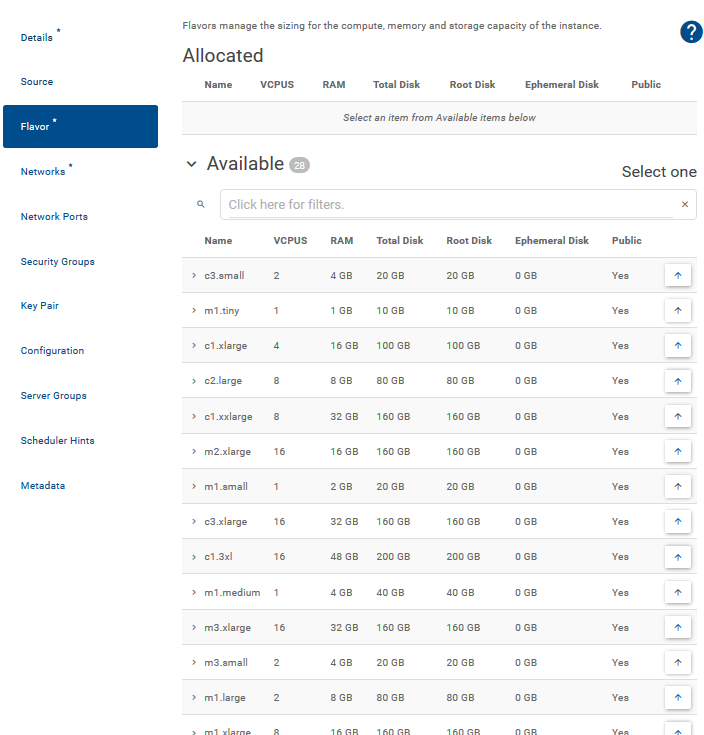
The Flavor determines the CPU, Memory and Disk combination. The list is much larger than the list shown above. It is suggested that you aim for CPU and Memory types that fit your needs best – it is possible to “resize” your virtual machine to a larger size later on, and also possible to add additional “volumes” to a Virtual machine if you need more disk space on it. Note the two different types “m” and “c”: The M types are shared CPU core, while C type are not shared (worthy of note that depending on which one you choose, it also determines which hypervisor type the Virtual machine will be scheduled to run on !). Click on the up arrow for the Flavor you wish to select. Click on “Networks” on the Left Hand Side:-
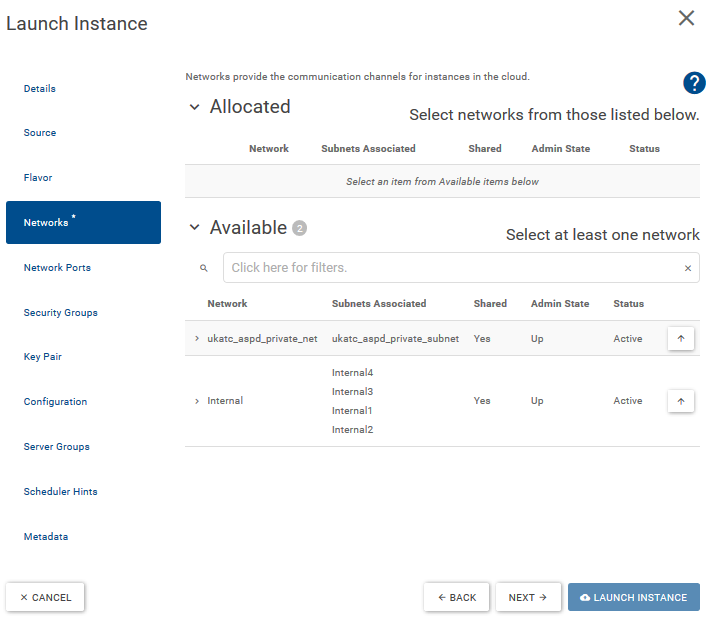
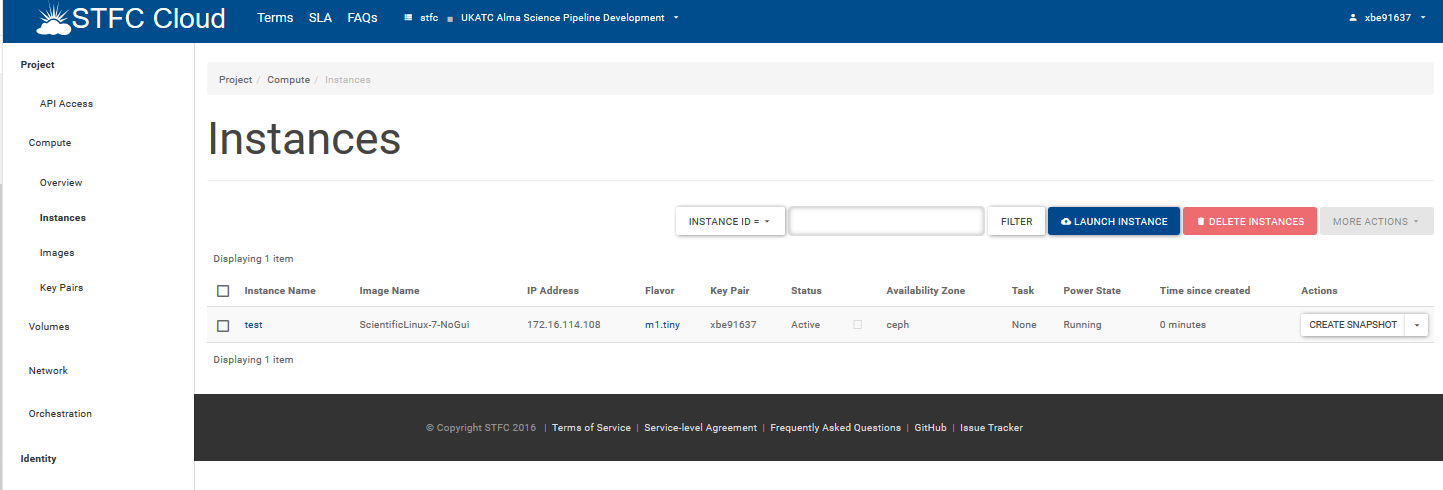
For Projects that just have one network type (Private or Internal) this is selected by default. A Hybrid project will have both a private network and an Internal Network, so one must be selected by clicking on an up arrow. That completes all of the mandatory Fields that you need to complete in order to create one or more virtual machines. At this point, the “Launch Instance” button should go dark blue, indicating that you can now create the VM. Other areas that you may wish to pay attention to when creating a VM would be ”Security Groups” as different security groups are often needed depending on if the VM is on the Internal Network or a Private Network. You may also wish to select which SSH key you wish injected into the Virtual machine when it starts. The other options on the Left hand Side, you will probably not need for day to day use unless you have a specialist requirement. The system will then be seen in the instances screen at various stages of completeness:-

You may see “Scheduling” and “Building” in the Task column as well. Once it is ready to connect to, you should see something like:-
At this stage, you may not be able to SSH onto it quite yet, but you may be able to log into the console, or at least see how far it has got in the boot process.
Common Things to do After Creating your VM
-You may wish to SSH to it: This you can only do if it was created on the “Internal” network, otherwise, you will gave to assign a floating IP address to the VM so that you can SSH into it. -You may wish to login using the console: This will only work if you are using a STFC FEDID as your Openstack user account. If you are not, then you need to SSH onto the VM first, create a user account, password, home directory, and entry in the /etc/sudoers.d/cloud file for the new user – this will then allow that user to login to the console. -You may wish to update the host (yum update, or apt-get update; apt-get upgrade). You may find that you cannot run “yum” the first time you login: This is because all Scientific Linux 6 and Scientific Linux 7 Virtual machines are partially managed by the configuration management tool in order to keep them up to date and well prepared. It is suggested that after the first 10 minutes or so, you reboot the VM so that all the updates will take effect. -A hybrid project will not see the “ScientificLinux7-AQ” or “ScientificLinux6-AQ” images by default: These are the fully Aquilon managed VMs and are available only to STFC folks who wish to use the Aquilon configuration management tool. Note that this can only be done on these image types, and if the hosts are on the “Internal” network.