Share a directory between Linux hosts on the same Network using NFS
Scenario
You have created a linux Scientific Linux 7 host on a Private (i.e 192.168.x.y ) network, which has a volume attached to it, and the volume has been “partitioned” and “formatted” with a linux file system and “mounted” on /data. This document describes how you can share that volume with other linux hosts on the same private network using Linux’s NFS server service. Important Security Note: For security reasons, this tech note is not appropriate for setting up a NFS server via a Float IP address (i.e 130.246.x.y address) or on the “internal network” (the host has a 172.16.x.y IP address). This is due to security reasons: The file share could easily be exposed to outside of your project without care for the Security Groups applied.)
Setting up the NFS server
On the NFS Server:
Set the correct permissions for the file-share.
Un-mount the volume on /data using the command “umount /data”.
Run the command “sudo chown nobody:nobody /data”
Run the command “chmod 777 /data” This changes the ownership and the permissions of the fileshare to that any user on the remote system will be able to read and write data to it.

Now re-mount the volume using the command:-
mount /dev/vdb1 /data
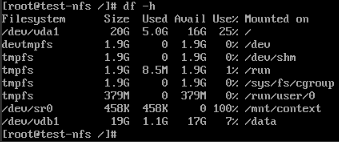
Check it is mounted using the command:-
df –hCheck the output, the line /dev/vdb1 is what we are looking for. If you have not already, make sure the following line is in the /etc/fstab file so that the volume mounts on host boot (otherwise you may be sharing out an empty directory !):-
Specifically this line

Now create the configuration file that tells the NFS server which area of the filesystem to share out, and what the restrictions and parameters are.
sudo echo “/data 192.168.248.0/24(rw,sync,no_subtree_check)” >> /etc/exports
Where:
/data is the area to share out,
192.168.248.0/24 is the subnet range of IP addresses that are allowed to connect to the file share.
The parameters in brackets : rw means read and write, sync means that the data has to be written to disk before applying it,
no_subtree_check prevents checking of directory trees.
You need to check that the NFS-server.service is enabled and running:
sudo systemctl list-unit-files --type=service
System should respond with something like:-
nfs-blkmap.service                     disabled
nfs-config.service                     static
nfs-idmap.service                      static
nfs-idmapd.service                     static
nfs-lock.service                       static
nfs-mountd.service                     static
nfs-rquotad.service                    disabled
nfs-secure.service                     static
nfs-server.service                     disabled
nfs-utils.service                      static
nfs.service                            disabled
nfslock.service                        static
In this case, we need to enable the nfs-server.service, and make sure it starts up when the system reboots. Run the command:
systemctl enable nfs-server.service
Run the following command to export the filesystem in /default:-
sudo exportfs
sudo exportfs –a
The system should show all the filesystems being “exported” by the NFS server in the /etc/exports file:-

At this stage – the server side is now setup.
Setting up the Security Group in Openstack
As the NFS server and NFS clients are on a “private” 192.168 network (in this example, they are on a 192.168.248.0/24 network), a security group should be applied that lets the NFS clients talk to the NFS server.
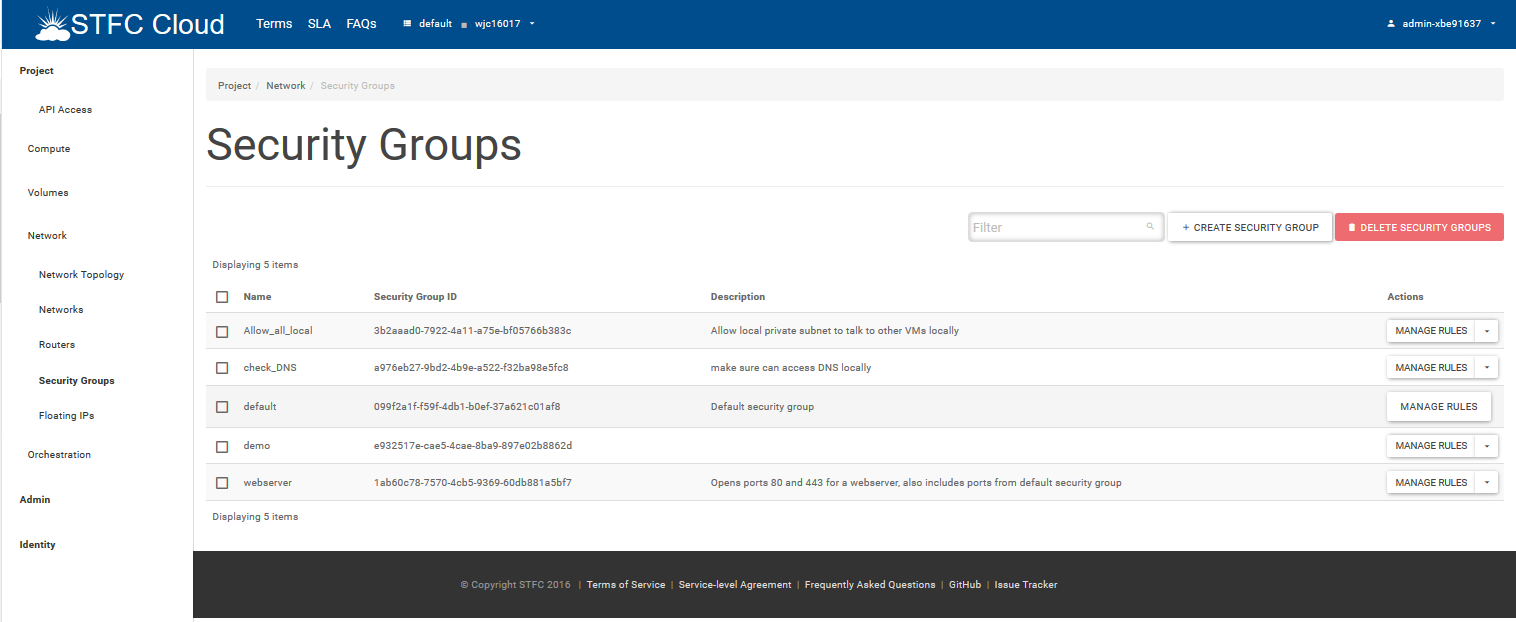
In this example, we are going to have a fairly open Security group so that other hosts within this specific Private Openstack project can see each other for all services. You can setup more details security groups for NFS – see the references for “NFS and security”. In the Horizon Openview Web Gui, navigate on the Left Hand Side menus to Network-> Security Groups
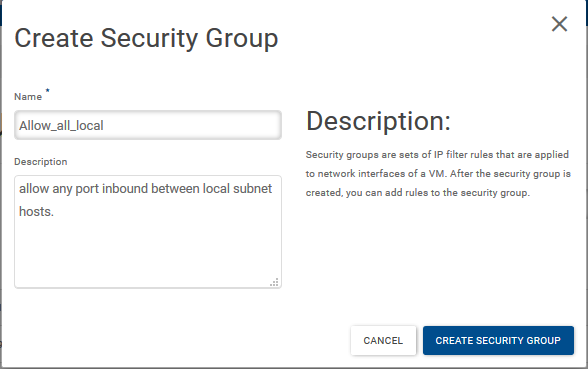
Click on “+Create Security Group” Give the Security groups a name and a description, then click on the “Create Security Group”:-
Create a rulebase that looks as follows – allowing “all ports” inbound for UDP and TCP:-
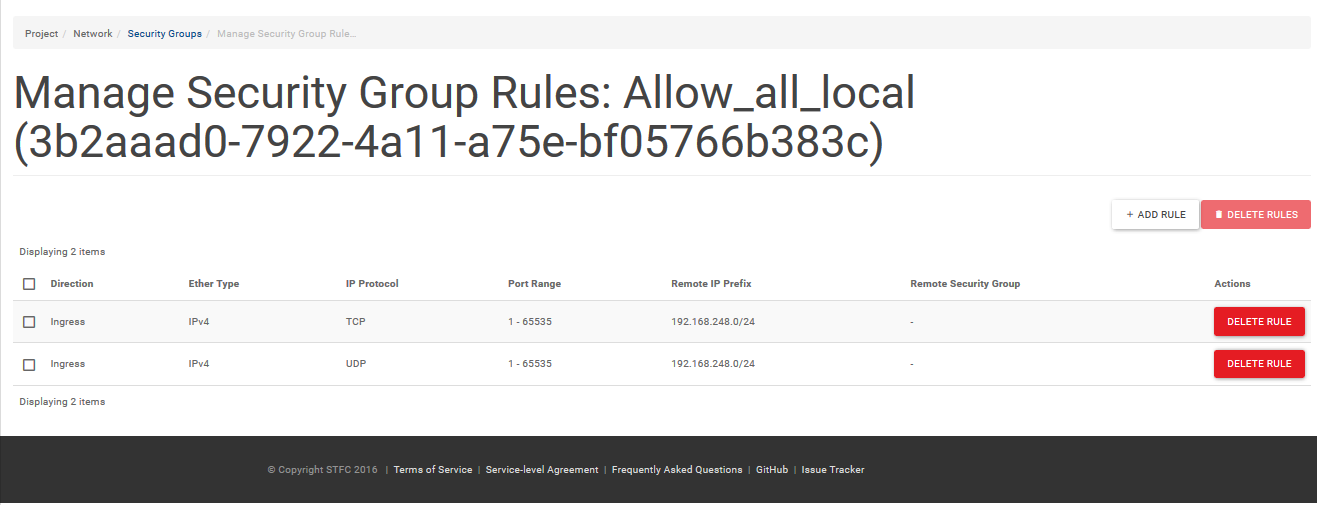
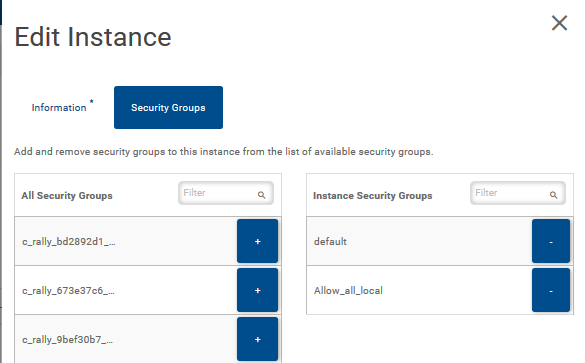
This will allow the other local hosts on your project private network full port access to each other. Add this new security group to your NFS server host, and any NFS client hosts. You can do this by navigating to the “Instances” window on the Left Hand Side Menu, then clicking on the down arrow in the Actions column of the VM host you wish to add the security group to, then select “Edit Security groups”. You can then add the security group you created to the VM:-
Setting up the NFS Clients
Ensure that you have added the security group to the NFS client host. Make sure the directory for where you wish to mount the remote file-system exists: In this case /data. You can create is with the command:-
sudo mkdir /data
You can “manually” mount the NFS share using the following command:-
sudo mount 192.168.248.26:/data /data
…where the IP address 192.168.248.26 is the Private IP address of the NFS server, and the /data is the :/data is the directory that is being exported. The second “/data” is the “mount point” of where the remote file system is mounted. You can check if the filesystem is mounted by issuing the command:-
df –h
which should show something like:- [root@testing-day16-round1-24 ~]# df -h Filesystem Size Used Avail Use% Mounted on /dev/vda1 10G 9.2G 862M 92% / devtmpfs 487M 0 487M 0% /dev tmpfs 496M 0 496M 0% /dev/shm tmpfs 496M 51M 446M 11% /run tmpfs 496M 0 496M 0% /sys/fs/cgroup tmpfs 100M 0 100M 0% /run/user/0 /dev/sr0 458K 458K 0 100% /mnt/context 192.168.248.26:/data 19G 1.1G 17G 7% /data If you wish to mount the remote NFS share when the NFS client machine boots, you can add the following line to the /etc/fstab file:-
192.168.248.26:/data /data nfs defaults
All users on the NFS clients should now be able to read and write to the /data directory. Further things you may wish to investigate and make use of It is possible to create “quotas” on the filesystem that is exported via NFS, so that you can account for how much disk space each user and group are using. You can enforce these quotas such that a particular user account can’t use all the disk space up. In this model, it is possible that more than one user will have the same userID, so they will have access to each others files on the file-system. It is possible to create a centralised userID server that can make each using have a unique userid when accessing the VMs and the shared Volume (Setting up a NIS sever with Home NFS directories would be an example of this). You can export multiple filesystems from different disks at the same time. You can test the speed of writing a file from the NFS client to the NFS server using a command such as:-
time dd –if=/dev/zero of=1GB_test.iso bs=1M count=1024
will return something like 1024+0 records in 1024+0 records out 1073741824 bytes (1.1 GB) copied, 6.77108 s, 159 MB/s
real 0m6.804s user 0m0.001s sys 0m0.664s …so 1Gbyte was saved in 6.77 seconds – 159Mbytes per second.
References
https://vitux.com/install-nfs-server-and-client-on-ubuntu/ https://www.tecmint.com/add-disk-larger-than-2tb-to-an-existing-linux/ NFS security: http://tldp.org/HOWTO/NFS-HOWTO/security.html